Metadata

Showing posts with label Cooking. Show all posts

Saturday 25 July 2015

Grandma's Apple Pie

The apples aren't ready to harvest yet, but things are shaping up for a good crop when the autumn comes. As we were admiring them the other day my mum suggested we pick a few of the Bramley apples for an early apple pie. We found a windfall or two to add to the mix as well, so that it didn't feel too sinful to harvest baby apples that haven't had a chance to reach their prime.


Every year when they're ready we have a glut of apples, way too many and all at the same time. So in a way it makes sense to use a few now to make an early season apple pie.

Just read on for my mother's recipe:

Thursday 9 July 2015

Home-made black currant cordial that won't rot your teeth ...

Last weekend the Fates were on my side, and Mr B, who’d been delegated the task of picking the black currants down in Devon, came home with just over a kilo of wonderful, ripe fruit. I’d asked him to get them for me never thinking that he’d actually follow through and deliver. But, notwithstanding my skepticism, and against all the odds, Mr B found his way to the black currant bushes, recognised them for what they were and harvested the crop – or as much of it as was ripe for the picking. He promises me that there are more yet to ripen in the not-so-very-hot Devon sunshine.

I decided to turn them into some black currant cordial, which I can add to a glass of Cava or still white wine on a hot summer evening. I have even been known to add it an innocent glass of sparkling mineral water to turn it into a minor celebration too.

It reminds me of my childhood. Growing up in the north of Ireland there weren’t many fruit crops that we could consistently rely upon to deliver jam-making produce in our cool, damp summers. But our little black currant bushes never failed us. As a consequence my mother and grandmothers relied heavily on this rare bounty for making jams, jellies, cordials and pies.

They’re a real heritage crop. In the dark days of the Second World War when the Nazi naval blockade was threatening the nation’s nutrition the government seized upon the black currant crop as the only means by which they could prevent an entire generation from being weakened by scurvy. The currants are full to bursting with vitamin C, and, as part of the War Effort, they were turned into syrup, which was then fed to the children to keep them healthy.

More recent studies have shown that consumption of black currants can also help reduce the effects of heart disease, diabetes and maybe even Alzheimer's. They're a bit of an all round superfood.

And I have to sing their praises for today’s gardener. They fruit reliably every year. I've had very little to worry about from either aphids or mildew - or anything else for that matter. They don’t need much attention. You just plant them in a hole in the ground, mulch around the roots a bit and let them get on with it. Prune them towards the end of winter and that's about it.  If you’re only going to grow one fruit crop in your garden I strongly recommend that you chose this one. 

And having packed all that fruity goodness into my cordial the last thing I want is to include cavity-inducing, tooth-rotting sugar, so I've substituted xylitol in place of regular sugar. If you wanted to use normal sugar that would work fine too.


Anyway if you’d like to make some cordial here’s the recipe:

Sunday 10 May 2015

Marmalade Biscuits

It's Sunday afternoon. We've finally got the homework done - yeah! The sun has put in an appearance. Mr B has cut the grass and there's that great spring smell of a freshly cut lawn. It's pretty fabulous outside, and I can feel a nice cup of al fresco Rosie Lee with one of my very best marmalade biscuits coming on. 


Now I know I've gone on in the past about how much I love marmalade (my middle name is Paddington). But, honestly peeps, I've got the very best Clementine and Cardamon Marmalade known to man - and I'm always keen to use it in everything, and at every available opportunity. It really is that good. 

And these biscuits with their subtle notes of cardamon and allspice, and the chewy bits of baked clementine from the chunky-cut marmalade are really very good, very good indeed. In fact they're just perfect for dunking in a cup of tea in the garden on a fine spring afternoon. 

Would you like to try one?

Thursday 19 March 2015

The very best Marmalade Cake in town ...


Yesterday I made a cake.  And, as a cake is a bit of a celebration over here at Talk-a-Lot Towers, I thought I'd better search around for something to celebrate. So having missed St. Pat's and Mother's Day it's a Vernal Equinox and Total Solar Eclipse Cake. How's that for something to celebrate?

Happy Vernal Equinox (on Friday) everyone!


The truth is this cake and I started out together about a week ago. We have history. Sad muppet that I am, I decided to make myself a Mother's Day Cake. The story gets even sadder as I put my experimental mixture into a cake tin that was way too small, which resulted in a cake explosion over the sides of the tin and all over the base of the oven. Then, not satisfied with the mess I'd made, I opened the oven door before the cake had finished rising, and the whole thing flopped. And then, when I finally extracted it I discovered that it was welded to the fancy cake mould, which, contrary to what it said on the label, really wasn't non-stick and ought to have been buttered like an oil-slick pre-launch.

It was cake-carnage, my friends. A great big tripple-whammy of a disaster.

Undaunted, and with a terrier-like determination that would put the Wonder Dog to shame, I tried it again the next day in a humble loaf tin. It was carefully greased and left in the oven for the requisite period of time without any curious door-opening to have a close-up on how the whole thing was getting along. And the result was pretty finger-licking good, even if I do say so myself.


Now the stealth ingredient here, which makes my cake just a little bit epic is the marmalade. It really is good. In fact, to state it plainly, if you like fragrant cardamon notes in your clementine orange marmalade, it's the marmalade of your dreams.  You can check it out here: Cardamon and Clementine Marmalade. It carries those wonderful top notes of cardamon into the cake, and it really is worth getting fat for. If you don't want to faff around making my special super-duper taste-it-in-your-dreams marmalade you can just substitute a tasty alternative of your own. I won't be too prescriptive but do bear in mind that your choice is important: the bottom line is that this cake will only ever be as good as the marmalade you make it from.


Anyway if you'd like to get your chops round some special marmalade cake, here's my recipe:

Ingredients

150 g butter
150 g caster sugar
1 large clementine (You could use any other small orange that you can lay your hands on. Blood oranges are good but their season is so short. My favourite citrus fruit is the clementine so I tend to use those whenever I can.)
2 large eggs
75 g of truly superb marmalade
150 g self-raising flour

And some icing sugar to dust on top of the cake once you're done.


1. Heat the oven to 180ºC  and line/ butter a smallish cake tin. For this recipe I have used a 1 1/2 pint Bundt pan. Alternatively you could use a 20cm x 11cm x 7cm loaf tin. If you're planning on using a Bundt pan make sure to grease it really well and sprinkle a dusting of flour on too for good measure.


2. Beat the butter and the sugar in the mixer until they are light and fluffy.


3. Whisk the eggs, and add them slowly to the mixture, a little at a time. Beat until they are uniformly mixed with the butter and the sugar.

4. Finely grate the skin of the clementine and add it to the mixture along with the marmalade. Mix until everything is uniform.

5. Fold in the flour. It's best to do this by hand with a big metal spoon. Keep going until all the flour has been absorbed without trace. It doesn't take very long so it's not too onerous to mix.


6. Spoon the mixture into the greased/ lined cake tin. Do not fill the cake tin to more than 3/4 of its depth, otherwise you risk a cake explosion over the sides, which is not pretty.


7. Bake for about 40 minutes in the oven, resisting all temptation to open the door and take a peek for the first 20 minutes or so. Check it after 35 minutes to see whether it's ready.

8. When it's done (a skewer, pushed in and then pulled back, should come out clean) take it out of the oven and leave it to cool.


9. When the cake has cooled dust the top with a sprinkling of icing sugar.

Enjoy in the sunshine after the excitement of the solar eclipse (fingers crossed) with a nice pot of tea.

All the best,

Bonny x


Wednesday 11 February 2015

Roasted cauliflower soup ...

I've just made a really moreish cauliflower soup.


We've got swim club tonight, which finishes late and, as there's school tomorrow, I need to have some supper that's going to be ready to serve up as soon as we get home. So the grand plan is to leave this in my Crock Pot with the setting on warm so that it's ready to go the moment we step through the door.

Mr B. should be home before us, but, as this soup's got cheese in, I'm not sure his technical skills would be up to reheating it. If we leave him in charge we're likely to find ourselves peering into a pot with a charcoal encrusted bottom and that awful smell of burnt food hanging in the air as he does his funny little tribal dance under the smoke alarm in a bid to disperse the fumes before it dials for the fire brigade.

Oh, no! We've been there too many times before. Mr B is the one person I know who really can't boil water, so we'll leave everything safely in the Crock Pot, and issue Mr B with an injunction prohibiting him from interfering with it in any way whatsoever.

Now, what makes this soup of yours so special, Bonny? I hear you ask your computer screen as you point a doubting finger at my mugshot and suspect me of hyperbole.

Well there are two stealth weapons that help make this the very best cauliflower soup in town:

1. Roasted cauliflower: I roast the cauliflower, which bigs up its flavour by a factor of about a thousand.
2. Le Roulé: I melt 150 g of French Roulé cheese into the pot before I bring it to the table, which bigs up the creamy, unctuous deliciousness by a factor of about another thousand (all scientifically-calibrated and totally conservative estimates, of course - ahem!).

Now I can't pretend that this is going to assist as part of your controlled weight loss plan, but come on peeps it's February! You can hide away all those adorable love-handles under layers of strategically draped wool for at least another couple of months.

So, now that that's all settled, here's what we're going to need for this wonderful soup of mine:

1 medium sized cauliflower, washed and cut into florets
1000 ml of good vegetable stock
1 medium sized onion, peeled and finely chopped
3 toes of garlic, peeled and finely chopped
2 medium sized potatoes, peeled and finely chopped
2 bay leaves
150g Le Roulé soft cheese
200 ml double cream - I use the Elmlea low fat cream in a token effort to regain a little ground in the calorie war that I'm so spectacularly losing at the moment.

And here's what to do:

Place your washed cauliflower florets in a baking tin and toss them with some olive oil. Roast them in an oven pre-heated to 190º C/ 375º F for 20 to 25 minutes, tossing them from time to time so that they don't brown.

Meanwhile sweat your onion, garlic and potatoes in a saucepan with a good glug of olive oil until they are all soft.

Add the roasted cauliflower florets and mix everything well before adding the vegetable stock.

Bring the mixture to a gentle boil and let it simmer for 10 to 15 minutes to allow the flavours to infuse and for everything to cook through.

Remove from the heat. Fish out the bay leaves and discard them. Then liquidise with a stick blender.

Add the cream and the cheese over the gentlest of heats. Stir in. The cheese melts easily into the soup to create a wonderful velvety delight, and the parsley in which it was rolled disperses through the liquid to make it look as though you're a wizard with the mandolin.

Serve with crusty bread, good company and a nice glass of vino.

All the best for now,


Bonny x


Thursday 22 January 2015

Les oeufs en cocotte à la crème ...

I've got a bad case of the January blues. A very bad case indeed.

I do try, but I just can't get enthusiastic about the month of January. It's my bleuch month, something to be endured, rather than enjoyed. And that's coming from someone who's hardwired to be positive and look on the bright side, but January defeats me. I hate her cold, grey skies and hard, unforgiving weather. I hate all those New Year resolutions that only serve to suck the joy out of life and leave us all feeling slightly inadequate. And I hate the fact that she doesn't even offer us an excuse for one good party. Heck I've been reduced to pulling out my Scottish ancestry - that's about three hundred years' removed from the present day - and rolling in my friends for a Burn's Night party. And, to be very honest, I don't even like the great man's poems. Promise you won't tell.

So what to do? Well my answer for today is ... comfort food, and it doesn't get any more comforting than this:


I give you oeufs with a side order of soldiers. It's got to be the ultimate fusion food, combining a great British food idea (soldiers to dip in your egg and mop up the runny yolk) with a lovely French one (pseudo steamed/ baked eggs in a cup).

I'm a great fan of scruffy old second hand book shops, and the other day I happened upon a lovely volume of Elizabeth David's French Provincial Cooking. Of course it had to come home.


It's a real classic. Elizabeth David was one of the greats. Her books are wonderfully wordy, written in a light conversational tone that frequently wanders away from the recipe to tell anecdotes and sound forth on issues that mattered to her. They give you a window onto what it must have been like to live here after the War. From their tone I'm guessing that her readership at the time were respectable ladies in twin-sets and pearls who subscribed to improving publications like Reader's Digest and were Ottolenghi-ed by her wonderful Mediterranean-inspired offerings

Now, to get back to the point in hand, what surprised me about Elizabeth David's account of how to make oeufs en cocotte was that she suggested the à la crème was an add-on. In our house a big dollop of double cream always came as standard. And, in my considered view, there's no way this baby could pass for proper comfort food without it.

If you'd like to make some you'll need some eggs (duck eggs with their great, big, orange yolks are really, really good, but hen eggs will do too), some double cream (or, if you prefer, you could use crème fraîche) and a knob of butter.

The first thing to do is turn your oven on to about 200 º C/ 390º F/ Gas Mark 6, and allow it to heat up.

Next boil the kettle, and pour the boiling water into a heavy-bottomed sauté pan. I use a cast iron oven-to-table casserole dish because its dimensions are just right and it fits easily into the oven. The water should be to a depth that will not flood your ramekins when you place them in the pan.

Place the ramekins in the pan of boiling water with a knob of butter in each. When the butter melts brush it around the ramekins and add a big dollop of fresh cream or crème fraîche. Then crack an egg into each ramekin. Season your eggs and put the pan with the ramekins into the preheated oven.


Leave in the oven for about 10 to 12 minutes (15 to 18 minutes if you've got great, big, gorgeous duck eggs) or until the eggs are cooked to your liking.

The eggs are ready for most people when the white has set and the yolk is still nice and runny, but if you don't like them that way you can always leave them to cook for longer.


Enjoy with some nice crusty bread toast, lashings of butter and a good cup of tea. As you can see my New Year/ New Me diet has been postponed until ... February!

All the best for now,

Bonny x

As shared on Friday Finds

Saturday 10 January 2015

Peanut butter and Clementine biscuits ...

Jeepers, creepers what weather we're having!

It's blowing such a gale outside that none of us have had any appetite to go out for our usual Saturday afternoon walk. I can't imagine what it's like for the folk caught in the Atlantic gales up in Northern Scotland. I loved the coast guard's description of how his window panes up in Stornaway were inhaling and exhaling with each gasp of the storm on the news the other morning.


So, in a bid to hide from the weather, we've cosied up indoors and done a spot of nesting. There's nothing to beat a cosy time on the sofa with a good book, some hot tea and nice stash of crunchy biscuits. My tea of choice these days is Punjana, which is what just about everyone in Ulster drinks.  It's a wonderfully strong, copper coloured beauty that's a delight for anyone who enjoys robust Indian teas.  And these little mamas were my biscuits of choice this afternoon. They're wicked!


If you'd like to make them they're also super quick and easy, and the ingredients are all work-a-day things that you're likely to have in your larder already - so, with any luck, you can avoid going out into the horrible weather.

Here's what you'll need to make about 14, 3 inch/ 7.5 cm diameter biscuits:

100 g/ 4 oz salted butter 
75g/ 3 oz soft, dark brown sugar
25g/ 1 oz golden syrup
1 tablespoonful of crunchy peanut butter
grated rind of 1 large clementine
100g/ 4 oz of plain cake-making flour
1 teaspoonful of baking powder
50 g/ 2 oz of rolled oats
25g/ 1 oz of finely chopped salted peanuts

And here's how you make them: 

1. Pre-heat your oven to 160º C/ 325º F/ Gas Mark 3.
2. Line a couple of baking trays with some baking parchment.
3. In a small saucepan over a very gentle heat melt the butter, sugar, syrup and peanut butter, stirring the mixture gently to get an even liquid consistency. 
4. Sift the flour and baking powder into a mixing bowl. Add the finely grated clementine rind and the rolled oats. Mix everything together until it is uniform.
5. Add the wet ingredients from the saucepan to the dry ingredients in the mixing bowl and give it all a good old stir to get a consistent, uniform mixture. 
6. Using a teaspoon divide the mixture into 14 or 15 round balls. Place each ball onto the baking parchment and push down gently with the back of the spoon to make round discs of about 1 cm thickness. They will spread a bit during cooking so leave a space between the biscuits that's at least 3 or 4 cm so that they can stretch out without conjoining.
7. Sprinkle the finely chopped peanuts on top of the biscuits, pushing them very gently into the biscuit dough.
8. Place the biscuits in the oven for about 20 minutes, until they've reached a lovely golden brown biscuit colour. Remove and leave to cool on a wire cooling tray.

Now go and put the kettle on for a nice cup of Rosie Lee. You've earned it!


All the best for now,


Bonny x


Monday 24 November 2014

The very best roast vegetable soup

Oh the weather outside is frightful
But the soup is so delightful
And since we've got no place to go
Let is snow, let it snow, let is snow.


OK, so I may have messed around with the lyrics, but the sentiment is totally authentic. When the weather outside is grey and miserable there's nothing to beat the comfort factor of a nice bowl of home-made soup.  And, for me, coming from Ireland, any kind of homemade soup has to be thickened with barley grains to give it substance. That's how my mum and my grandma used to make soup when I was a little girl, and that's how I like it.


These days I add a mixture of barley, split peas and lentils. Sometimes I buy a packet of mixed grains that have been put together specifically for adding to soups or stews, and I love the variety of the textures and flavours that they add.


This recipe maximises the flavour of the winter vegetables by roasting them slowly in the oven. The cumin and turmeric add extra warmth and depth of flavour.

Anyway if you'd like to try your hand at a spot of soup-making here's what you'll need for 6 servings.

Ingredients:

150 g (5 1/4 oz) barley soup grain mix
2 litres (3 1/2 pints) of good vegetable stock
1 medium sized butternut squash
2 large parsnips
4 medium sized carrots
2 medium sized brown onions
3 tablespoonfuls of chopped freshly cut sage leaves
2 heaped teaspoonfuls of ground cumin
1 level teaspoonful of turmeric
bacon lardons for serving: I fry 100 g (3 1/2 oz) per person and drain them on some kitchen paper to remove excess oil before sprinkling them into the soup
grated cheese (Cheddar or Emmental work well) for serving

Method

1. Peel all the vegetables and chop them into chunks. Place on a roasting tray and toss with some olive oil and the chopped sage leaves. Season with salt and black pepper, and cook in a pre-heated oven at 200º C (390º F or Gas Mark 6)  for 45 minutes. Turn them over once during this period so that they cook evenly.


2. Whilst the vegetables are roasting, cook the barley mix in the vegetable stock until the grains are cooked through.

3. When the vegetables have cooked blitz them in the food processor and add to the vegetable stock/ mixed grains. Be sure and add all those wonderful rich juices that will coat the bottom of the roasting pan to the soup mix as they'll be full of added flavour. Stir well, add the spices and heat through until it reaches your ideal temperature for serving.

4. Fry the bacon lardons and coarsely grate some cheese. Serve the soup with the bacon lardons and grated cheese on top.

Delicious! It's pretty substantial so you'll need very little extra to fill your people up at supper time.

Enjoy with a nice glass of Rioja and good company!

All the best for now,

Bonny x

Friday 7 November 2014

Cardamon and Clementine Marmalade

Today my kitchen smells of clementines. Their sweet aroma, mixed with some upper notes of green cardamon is so good that if I could figure out a way of bottling it I'd wear it behind my ears for special occasions!

I've played around with the flavours to produce a light fragrant, not-too-sweet marmalade. Cardamon is one of my favourite flavours, and these green cardamons marry beautifully with the floral, citrus taste of the clementines, which I've ramped up further with the Cointreu. I'd say it's a flavour match made in heaven!


Would you like to make some for yourself? Well, no worries, here's my recipe :

Ingredients

1200g clementines - about 8 clementines
2 medium sized lemons
2 kg jam-making sugar
2.5 litres of water
1 tablespoonful of green cardamon pods split lengthways
8 tablespoonfuls (120 ml) of Cointreau
Certo apple pectin for emergency use if you can't get the mixture to set as you may not have enough pips in the clementines to give you all the pectin you need.


Method

A: Day 1

1. You really need to start this recipe the day before. The first thing to do is wash the fruit in some fresh, clean water. Then juice the clementines and lemons, finely slice them and let them soak overnight in their juice to soften up the skins a bit and release some of their natural pectin. I half them and extract all the precious pips, which I place on a saucer for safe keeping. These are full of pectin, and will help your marmalade to set.


2. Take all the pips and tie them in a little square of muslin. Draw the four corners together, and tie them with a piece of kitchen string to make a parcel like this:


3. Place the skins in a large ceramic bowl, pour the juice over the top, and pop your parcel of pips into the mix. 

Cover with cling film and leave overnight to allow the juice to work its magic on the skins.

Day 2

4.Take an old saucer and put it in the freezer to get it really cold. You will use this to test the consistency of your marmalade later in the process.

5. Put your citrus skins/juice/pips mixture in a large saucepan. Add 2.5 litres of fresh water and bring to the boil. Once it reaches the boil, turn down the heat and leave to simmer gently for about two and a half hours until the skins are soft and slightly translucent.

6. While you’re waiting for the skins to cook you should sterilise your jam jars. Wash both the jars and their lids in hot soapy water. Rinse well with warm clean water. Dry the outsides but not the insides. Place them on a baking tray (open top ends up) with the lids (top sides up) on a separate tray in an oven pre-heated to 150 degrees Celsius for about 20 minutes to half an hour.


7.You should also warm your sugar. With about half an hour to go before the lemons are ready, weigh it out and put it in the oven at about 150 degrees Celsius in a large flat dish.

8. When the citrus skins in the saucepan have been boiled to the point where they are soft and translucent, add the sugar, cardamon pods (split in half length-ways) and a knob of butter (this helps to stop it burning, according to my mum) and bring to a rolling boil, which is a gentle boil that isn’t too violent – think of gently churning rapids downstream from a large waterfall. Stir occasionally and let everything boil for another fifteen minutes or so until it starts to set. You could use a thermometer for this stage to check the temperature. The marmalade should start to set somewhere around 104 degrees Celsius.

9. When it reaches this stage, and you see it starting to thicken, you need to do the frozen saucer test. Take your saucer from the freezer and drip a little drop of the marmalade onto it. Leave it for a few seconds and then gently push it with your fingertip. If the marmalade is ready it should have formed a thin skin on top and you should be getting wrinkles when you apply pressure. It may still seem to be too liquid for spreading on your toast, but if there is a very thin skin with wrinkles you are good to go. The mixture will thicken/ solidify a bit more once it cools, and sometimes it will carry on setting for a few days after. This is the trickiest stage of the process, so do keep your eyes peeled.

Anyway if you haven’t reached this point let the mixture boil on for another three or four minutes and test again. Keep going until you get that skin-and-wrinkle-thing happening on your saucer, but be really careful as it can easily burn if it overheats (and, believe me, cleaning the bottom of the saucepan when it does is a nightmare job).

If you can't seem to get the stuff to set you can always add a spoonful or two of pectin and watch for it to do its magic. I keep a bottle of Certo apple pectin for these occasions.

10. Once the marmalade has started to set remove the saucepan from the heat, and add the Cointreau. Be careful as the hot mixture may spit a little when you introduce the cold liquid. Stir thoroughly and leave for about 15 minutes to cool. Skim the cardamon pods out of the mixture with a slatted spoon while you're waiting for the mixture to cool down.  This cooling will also allow the mixture to set a little more. Stir it again before you ladle it into the sterilised jam jars. By stirring it once it has thickened like this you will ensure an even distribution of peel throughout the mixture.


11. Top the jars of marmalade with waxed disks and put the lids on.

12. When everything has cooled down a bit you can add some stick-on labels.

Enjoy with hot buttered toast and a good cup of Rosie Lee!


All the best,


Bonny x

and if you've got the marmalade bug you might also like to try my lemon and lavender recipe, which you can find:  here.


Tuesday 4 November 2014

Boozy Bejeweled Christmas Cake Recipe

Now is a really good time to get cracking with your Chrimbo cakes. They really do improve, just sitting in the tin, waiting for the Big Day to arrive - especially if, like me, you treat them to the occasional tipple along the way.


Emi and I were really busy last week, during the half term holidays, baking loads of cakes. I like to make a few extra for friends and family whilst I've got the wind in my sails. My recipe is an old family one that I've tweaked a little bit to suit my own personal style. My Grandma used to make these cakes using sherry, but I prefer Marsala wine. I've also chosen my favourite dried fruit from my local Turkish grocer, which is a rather different combination from the one she used. In fact I'm sure my dear old Gran, living in rural County Tyrone twenty years' ago, would never have heard tell of things like dried barberries. I've also chosen not to decorate the cakes with marzipan and icing. I love almonds, but I really dislike almond flavourings, so marzipan is not a favourite of mine. Instead I'm using glacé fruits with a glaze. I love the colours and the glossiness of this topping, and it's a super quick, easy way to decorate a cake. I also like to make small cakes (6"/ 15 cm diameter) rather than big cakes so that people don't get bored with them, although they will last for months in their tins.


If you'd like to give this little number a go, it's a very quick, simple cake to make. Here's the recipe:

Ingredients for 2 small 6"/ 15cm diameter cakes or 1 large 12"/ 30 cm diameter cake 

1 kg/ 2 lb 4 oz of mixed dried fruits.  I used 250 g/ 9 oz golden jumbo raisins, 250 g/ 9 oz brown jumbo raisins, 250 g/ 9 oz dried cranberries, 125 g/ 4 1/2 oz  dried barberries and 125 g/ 4 1/2 oz dried papaya, but you can chose whichever mix of dried fruit you prefer.


175g / 6 oz plain cake-making flour
200g/ 7 oz soft brown sugar
zest and juice of 1 large orange
zest and juice of 1 large lemon
250g/ 9 oz butter at room temperature
100g/ 3 1/2 oz ground almonds
100g/ 3 1/2 oz flaked almonds
1/2 teaspoon baking powder
2 heaped teaspoonfuls of mixed spice
1 heaped teaspoonful of powdered cinnamon
1/2 teaspoonful of powdered cloves
4 large eggs - beaten
1 teaspoonful of vanilla extract
150 ml/ 5 fluid ounces of Marsala Wine
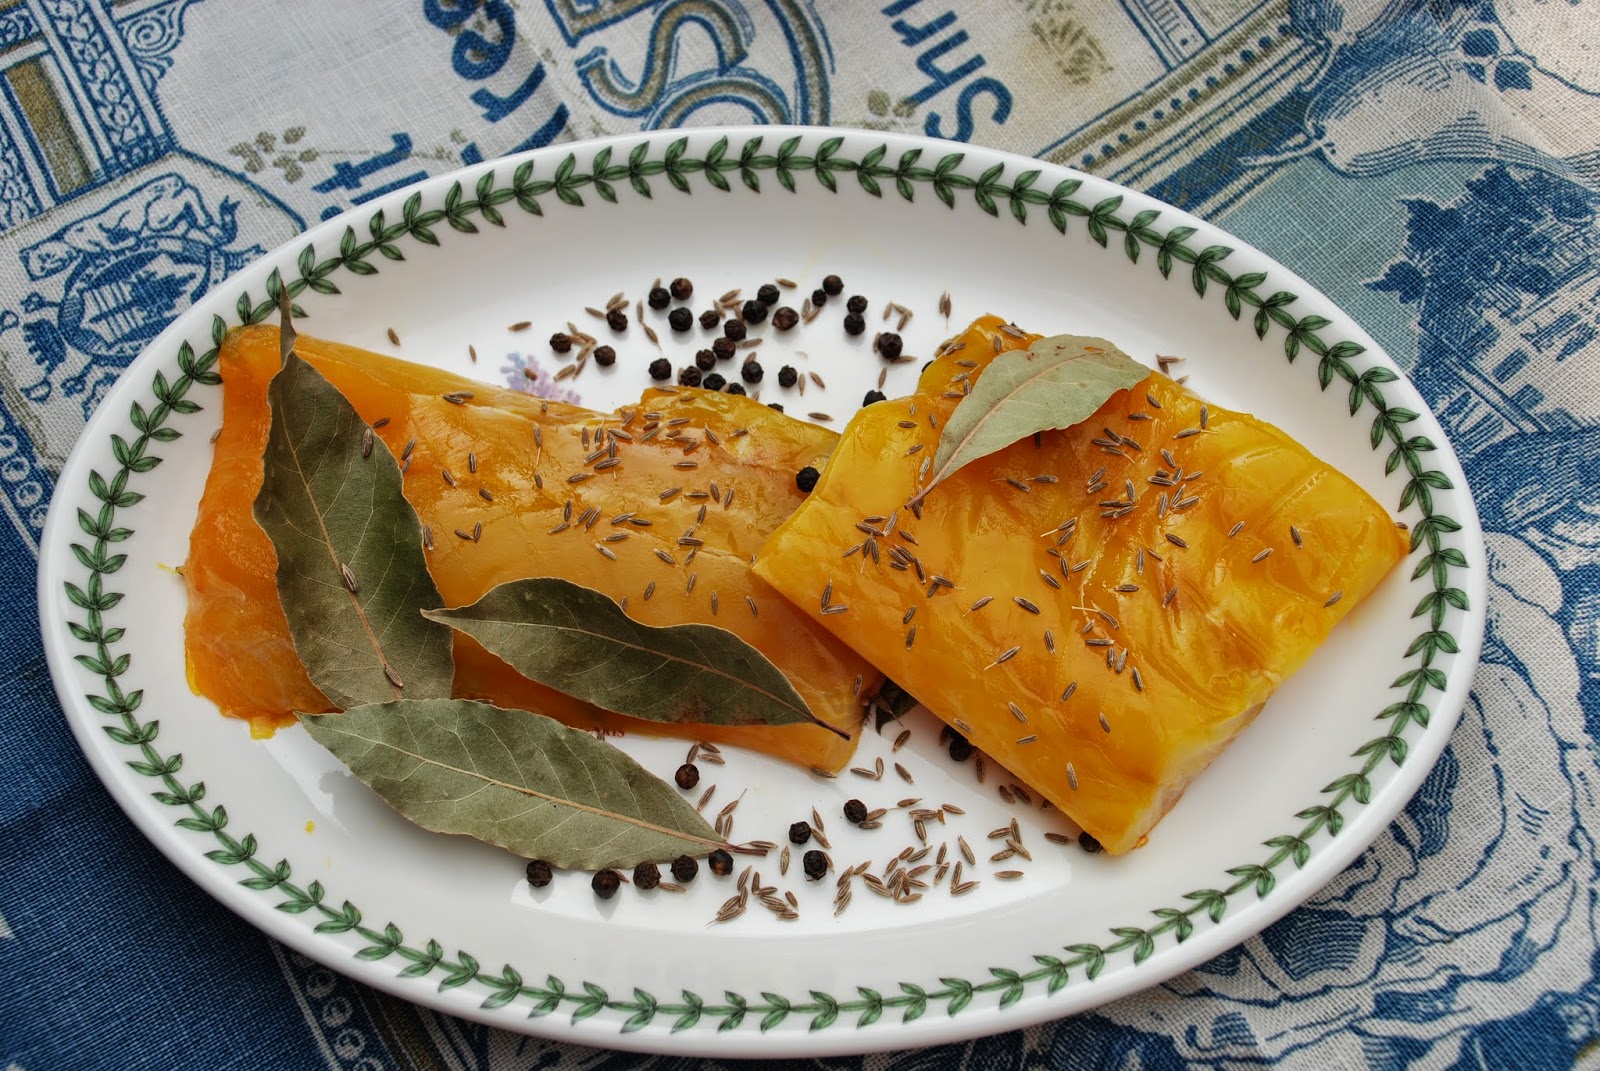
Method

1. Choose a large saucepan. Place the dried fruit, orange and lemon juice and zest, Marala wine, butter and sugar in the saucepan and heat over a medium heat until the mixture comes to the boil. Then reduce the heat and allow to simmer gently for 5 minutes. Mix thoroughly and remove from the heat. Leave to cool for about 30 minutes. 

2. Whilst the mixture from 1. above is cooling heat your oven to 150º C/ 130º C with a fan/ Gas Mark 2 and line your cake tins with grease-proof baking parchment. You'll need a circle for the bottom and a long rectangle to line the sides. I usually fix it in place with a spot of melted butter. I also like to use spring release cake tins, which make it easier to get the cakes out at the end of the process. 


3. When you've got them lined on the inside, wrap them with newspaper on the outside and tie it in place with some string so that they cook, and cool down afterwards, really slowly. This ought to help prevent your cakes from cracking.


4. After your mixture from 1. has cooled down a bit add all the remaining ingredients, sieving the flour and mixing it thoroughly to make sure that everything is evenly distributed and there are no pockets of flour. 

5. Tip the mixture into the prepared baking tins and place them in the centre of the oven. Cook for about 2 hours - until a skewer inserted into the top of the cake comes out clean. Remove from the oven and leave to cool. 


6. Make a few discreet holes with a skewer - going in from the top. These will form little channels so that the wine that you feed the cake between now and Christmas gets evenly distributed. 

7. When the cakes have completely cooled, wrap them in some grease-proof baking parchment and store them in cake tins. Feed each cake every 10 days or so with 2 teaspoonfuls of Marsala wine. Don't feed it for a week immediately before you decorate it.  


And would you also like my recipe for the decoration on top? Ok, no problem.

Ingredients for cake topping

1 heaped tablespoonful of apricot jam or honey
2 tablespoonfuls of brandy
Whatever combination of glacé fruits and nuts that you'd like to use. I chose some glacé cherries and apricots with some roasted pecan nuts.

Method


1. Place the jam and brandy in a small saucepan. Place over a medium heat until the jam melts, stirring until the two are evenly mixed.

2. Leave the jam and brandy mixture to cool. I keep mine stored in a small jam pot in the fridge so that I can use it for the other cakes that are in the pipeline.

3. Arrange your fruit and nuts over the top of your cake, and very gently brush them with the jam and brandy mixture using a pastry brush. 

4. Wrap up your cake for presentation. I used a rectangular food doily, cut lengthways as an internal wrapper with some brown paper on the outside tied up with a festive ribbon. 

Enjoy with friends and a nice cup of Rosy Lee. 

All the best,

Bonny x
As shared on Creative Mondays


Saturday 6 September 2014

Fish chowder and beating the end-of-summer blues ...

At the risk of being boring - I know I've mentioned it before -  I'm really not ready to let go of summer just yet. Back beneath a leaden sky in London I'm missing the warm Catalan sun, our sandy beach and the wonderful mariscos, fresh seafood, landed off the fishing boats in our little harbour back in Sant Feliu, where I'm sure the sun is still shining and the sky is still a deep cerulean blue.

As a way of beating the end-of-summer blues I've turned to comfort food. And for me comfort food doesn't gets any more comforting than the smoky, creamy taste of a good fish chowder.  My favourite food in all the world is smoked fish. I could happily eat kippers every day of my life ...  which is probably something to do with my being Irish. And, as it happens, one of the things I miss when we're in Spain is good smoked fish. Maybe up in Galicia, where they're all really Celtic rather than Latin, they do our smoked fish thing, but in the rest of Spain you can pretty much forget it. There's the odd packet of thinly sliced, smoked salmon in the Mercadona chiller cabinets, but that's it.

So yesterday I made a great big pot of chowder, which was all steaming and ready to slurp when Emi got back from swim club. D-E-L-I-S-H! Bacon-fish soup, the young man hollered as he came through the door. I should add, by way of explanation, that we are also enthusiastic consumers of smoked streaky bacon over here at Talk-A-Lot-Towers, hence bacon-fish is a (not-so-short) shorthand for smoked fish.

Anyway I'm digressing. Shall I tell you how I make this creamy ambrosia of mine?


Ingredients (for 4 servings)

400 g of smoked white fish fillets. You can use any chunky white fish: haddock, pollock, cod, whatever you can find. Some people prefer to use un-dyed fillets as they look prettier in the creamy chowder, but I'm not fussy on that point.
3 or 4 bay leaves
200 ml milk 
300 ml of double cream (to make this feel less of an artery-clogging, cholesterol-fest I use the low-fat Elmlea double cream - I don't know how they deliver on that, and I wouldn't pour it over my strawberries, but it tastes just fine when you're cooking)
700 ml fish stock
1 teaspoonful of cumin seed
1 teaspoonful of peppercorns
2 large leeks washed and finely chopped
4 medium potatoes, peeled and diced into small cubes
2 medium carrots, peeled and thinly sliced
200 g sweetcorn (off the cob)
Dollop of butter and olive oil for cooking

What to do: 

  1. Place the fish fillets in a large saucepan (I use a big reducing pan) with the fish stock, the bay leaves and the pepper corns and bring to a gentle simmer. Poach gently for several minutes until your fish starts to flake in the chunkiest parts of the fillet.
  2. Remove from the heat, and leave your fillets on one side. Strain the stock to remove the bay leaves and the pepper corns.
  3. Melt the butter and olive oil in a pan and sweat the finely chopped leeks with the cumin seed until they are soft but not browned. 
  4. Add the cubed potato, stir everything around and leave to sweat for another minute or two, but, as before, don't let anything brown. 
  5. Season and add the stock. Stir everything, cover with the lid and bring to a gentle simmer. Leave to cook gently until the potato is almost cooked.
  6. Add the carrot and cook for another couple of minutes.
  7. Using a fork break up the fillets of fish into flakes.
  8. Add the milk, the cream and the flaked fish to the pan. Stir gently, and heat everything through. Serve hot with crusty bread.


Mmmmm ... maybe the autumn won't be so bad after all ... .

All the best for now,

Bonny x


Monday 11 August 2014

Frozen yoghurt, blueberry and Cassis ice lollies ... a little bit naughty, but very nice

We had a slightly perverse reaction to Big Bad Bertha, the summer storm that passed this way yesterday. We battened down the hatches, put on some summer music ... and made ice lollies.  It may have looked like autumn outside, but inside we were holding on tight to those precious summer vibes.


Maybe it's just me; maybe I'm in denial. But the truth is that I'd like the world to stop so that summer can go on forever. These wonderful carefree days of sunshine (when Bertha's not around), no school deadlines and all the time in the world to do whatever we feel like suits me just fine. Another game of swing-ball anyone?

Anyway, back to the serious business of ice lollies: here's one of our lemonade lollies, proudly displayed by Emi, my sous chief.


We made up the recipe for lemonade, which I posted here: homemade lemonade recipe and poured some of it into our lolly moulds and bingo we had the very best lemonade lollies in town.

We've tried different types of smoothies as fillers for our lollies, but one of my favourites is this frozen yoghurt and blueberry ice lolly with a naughty little splash of Cassis to jolly things along.

Ingredients (for 5 to 6 lollies)


150 g blueberries
40 g Xylitol or sugar
250 g Greek yoghurt
1 tbsp freshly squeezed lemon juice
30 ml Cassis  (if you prefer not to use Cassis substitute another 30 ml of water instead)
20 ml water

Method

Wash your blueberries and tip them into a saucepan with 30 ml of Cassis and 30 ml of water. Add the Xylitol and heat over a gentle heat for several minutes until the blueberries start to pop. You could use sugar instead of Xylitol, but I've been telling everyone who'll listen to me recently about this great sugar substitute that doesn't rot your teeth ... check out my lemonade post for more details.


Remove from the heat and add the Greek yoghurt and lemon juice. Stir to an even consistency and fill your lolly moulds.  Place in the freezer for several hours or ideally overnight.


Enjoy with sunshine, summer music and your nearest and dearest,

Bonny x


Monday 4 August 2014

How to make the very best pink sparkling lemonade ... that won't rot your teeth

Summer just wouldn't be summer without lemonade ... and the Piña Colada song (!). OK! OK! So not everyone likes the Piña Colada song ... but I don't know anyone who doesn't like a good glass of lemonade.


There are some things that are just made for each other and summer and lemonade are two of them. But these days that gives me a teeny weeny dilemma. What with all this talk about how fizzy drinks are rotting our children's teeth and everything I've been feeling a bit reticent about allowing Emi one of the pleasures of my own childhood.


But I've come up with a crafty plan, which I think solves my lemonade dilemma with something out of my home chemistry set called xylitol, which is a natural sugar substitute made from ... birch tree bark (according to the back of the packet ). It says that it's got 40% fewer calories and 75% less carbohydrate than sugar and, most importantly of all, it helps to protect teeth from dental cavities and to remineralise tooth enamel (yeah!). You use it pretty much weight for weight as you'd use sugar. Just one word of caution: like chocolate it is toxic to dogs, so don't go sharing this wonderful lemonade with your favourite pooch (as if).


Now if there's one thing that's better than home-made sparkling lemonade it's got to be pink home-made sparkling lemonade. And I'm borrowing all that lovely pinkness from a pomegranate, courtesy of a splash to elderflower and pomegranate cordial.

So here's what you'll need to make about 3 pints or a litre and three quarters of my wonderful brew.

Ingredients:

6 unwaxed lemons
5 oz. or 150 g xylitol (or granulated sugar if you're old school)
Couple of tablespoonfuls of elderflower and pomegranate cordial (a heresy in some quarters, but, trust me, it adds that certain little twist of extra interest of flavour and pinkness that turns good into delicious)
1 litre or 2 pints of sparkling mineral water

Method:

1. First you need to wash your lemons in warm water, dry them well and then thinly grate the outer zest. I have this wonderful little gizmo called a microplane that's not exactly high-tech expensive, but it's the best little lemon-zester in town. Avoid the white pith just under the wonderful lemon zest as it tends to make things bitter.


2. Next you need to juice all 6 lemons and place the juice with the grated zest together in a bowl.

3. Add the xylitol (or sugar) and 1/2 of a litre of boiling water to the lemons, stir well and leave to cool. When it's cooled store it in the fridge overnight - or until you want to use it. I let it cool and then pour it into some recycled glass bottles that I can screw the lids on and store in the fridge until I want to use it.


4. Chill the super-sparkly mineral water in the fridge.

5. When you are ready to serve sieve the lemon liquid through a coarse sieve, add the elderflower cordial and the sparkling mineral water so that it tastes just right (my suggested amounts of both water and cordial should be tinkered with so that the lemonade is perfect for your palate), give it a quick stir and serve immediately.

Delish ...

... enjoy with sunshine, friends and the Piña Colada song,

(which you can listen to here: https://www.youtube.com/watch?v=w5_EIikdFr8)

Bonny x

As shared on Creative Mondays and a Pinch of Joy